 WriterMorph
Help › Manuscript
Manuscript Mode
Work on your book with a binder, editor, corkboard, outliner, combined pages, split panes, an inspector and collections.
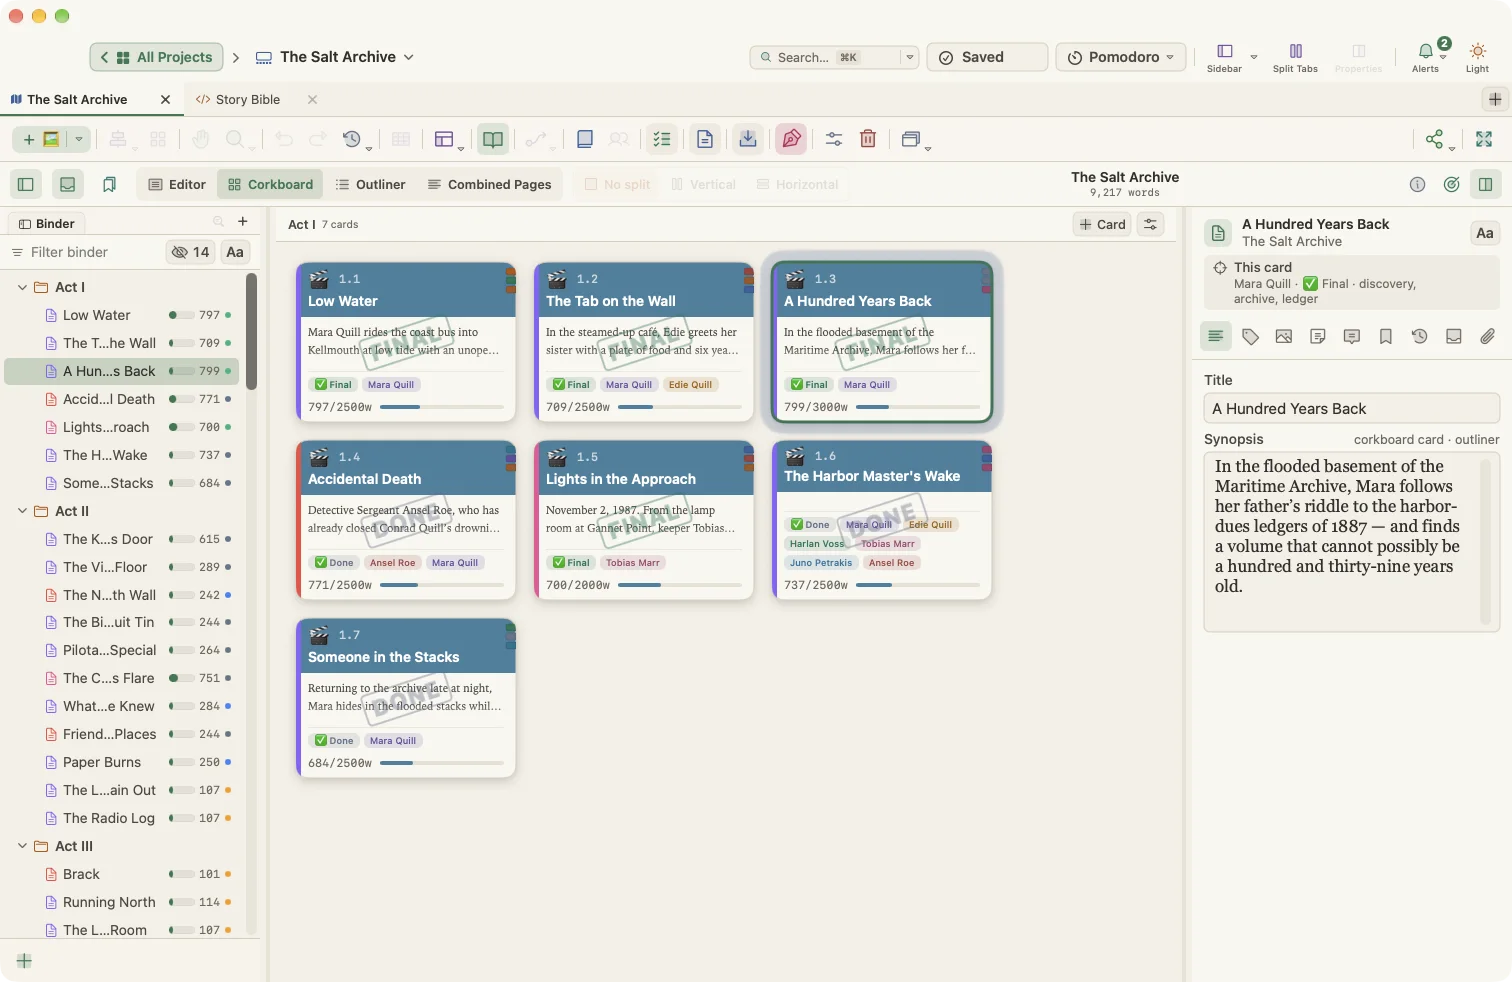
Manuscript Mode shows your project the way a long-form writing app does: a binder of folders and documents on the left, the text in the middle and an inspector on the right.
The canvas and Manuscript Mode read the same cards, so a change in one appears instantly in the other.
Switching in and out
- Choose View › Manuscript Mode or press ⌥⌘M.
- Press ⌥⌘M again to return to the canvas.
Tip: Navigate › Show Selected Card on Canvas jumps from a document to its card on the canvas, zooms to it and briefly highlights it.
The binder
The binder (View › Binder, ⌥⌘B) is the table of contents of your project. The order you see is the order of the book, and it is the order Compile follows.
- Click a document to open it.
- Drag a row to reorder it. Drop on the top quarter of a row to place before it, on the middle to put it inside, or on the bottom quarter to place after it.
- Right-click for New Text, New Folder, Group into New Folder, Merge, Include in Compile, label and status, Show on Canvas and more.
Reference material such as character profiles, places and research notes lives in the binder too, but outside the manuscript, so it is never compiled.
Keyboard control
When the binder has focus (Navigate › Move Focus To › Binder, ⌃⌘B):
| Key | Action |
|---|---|
| ↑ / ↓ | Select the previous or next row |
| → / ← | Expand or collapse |
| Return | Open |
| ⌥Return | Rename |
| Delete | Move to the trash (asks first) |
| ⌥↑ / ⌥↓ | Move up or down among siblings |
| ⌥→ / ⌥← | Indent or outdent |
Four ways to view a document or folder
Use the View menu or the view buttons in the manuscript header:
| View | Shortcut | Best for |
|---|---|---|
| Editor | ⌘1 | Writing one document |
| Corkboard | ⌘2 | Seeing synopses as index cards and reordering them |
| Outliner | ⌘3 | Titles, synopses and metadata in sortable columns |
| Combined Pages | ⌘4 | Reading and editing several documents as one continuous text |
Corkboard options
View › Corkboard Options lets you show label colors along card edges, status stamps, keyword colors and card numbers (optionally numbered per section), show blank cards as ghosts, and fit card height to the text. You can also set the number of cards across, the card width and the card text size.
Outliner options
View › Outliner Options chooses the columns. Available columns include Synopsis, Label, Status, Keywords, Section Type, Include in Compile, Word Count, Character Count, Target, Progress, totals for words, characters, targets and progress, and Created and Modified dates. Your own card properties can appear as columns too. Keywords can be shown as color chips, and you can center the content or use a fixed row height.
Split panes
View › Editor Layout offers No Split, Split Vertically and Split Horizontally. Each pane has its own header, so you can write in one pane while you read notes or another chapter in the other. Use Open in Other Pane from a binder item's context menu to send a document to the second pane.
The Inspector
View › Inspector (⌥⌘I) shows details about the selected document. Its tabs are:
- Synopsis: the title and the short summary that appears on the corkboard and the canvas card.
- Metadata (called Properties for cards): label, status, keywords, include-in-compile and your custom properties.
- Media: an image, video, web page, PDF or HTML shown on the card.
- Files: files attached to this document.
- Notes: private notes that are never compiled.
- Comments: the comments and footnotes in the open text, in order.
- Bookmarks: documents, files and web pages linked to this document.
- Snapshots: saved versions of this document. See Revisions, History and Snapshots.
- Collections: the collections this document belongs to.
Collections
A collection groups documents without moving them, for example "Needs revision" or "Chapters with the villain".
- Documents › New Collection from Selection… makes a collection from the selected documents.
- Search the binder, then choose Save Search as Collection… to create a collection that stays up to date.
- View › Collections shows the collection tabs above the binder. Selecting one filters the binder.
Bookmarks
View › Bookmarks (⌥⇧⌘B) opens a panel of documents and files you want to keep at hand. Drag documents or external files into it. Project › Show Project Bookmarks (Favorites) (⇧⌘B) lists your project favorites.
Organizing documents
The Documents menu contains everything you need to shape the book:
- New Text (⌘N) and New Folder (⌥⌘N)
- Group into New Folder (⌥⌘G) and Ungroup (Move Out of Folder) (⌥⌘U)
- Move › Up / Down / Left (Out of Folder) / Right (Into Previous Folder) (⌃⌘ plus an arrow key)
- Move To › Top Level or any folder
- Split › Split at Selection (⌥⌘K) and Split with Selection as Title (⌥⇧⌘K)
- Merge (⇧⌘M)
- Convert › To Folder / To Text
- Include in Compile (toggle)
- Move to Trash (⌘⌫)
Edit › Sort sorts a folder's children A → Z or Z → A, and Edit › Append Selection to Document sends the selected text to the end of another document.
Targets and statistics
- Project › Show Project Targets (⇧⌘T) sets a manuscript word target and a session target. Add a Deadline and your Writing days, and WriterMorph can calculate the session target automatically (words left divided by writing days left). It can also tell you, with an optional sound, when you reach a target.
- Project › Statistics… (⌥⇧⌘S) opens the project's statistics panel.
- The text statistics view counts words, characters, paragraphs, sentences, estimated pages (at 250 words per page) and reading time.
- Project › Show Project Keywords (Tags) (⇧⌘K) lists every keyword in the project.
Quick Reference
Navigate › Open Quick Reference (⌥⌘Space) opens the current document or the selected card in a separate preview window, so you can keep a character sheet or research note in view while you write elsewhere.