 WriterMorph

How to outline a novel: from one sentence to a scene list
Write the premise in one sentence, find the turning points, break the story into scene cards and move them until the gaps show. Then do the same in WriterMorph.
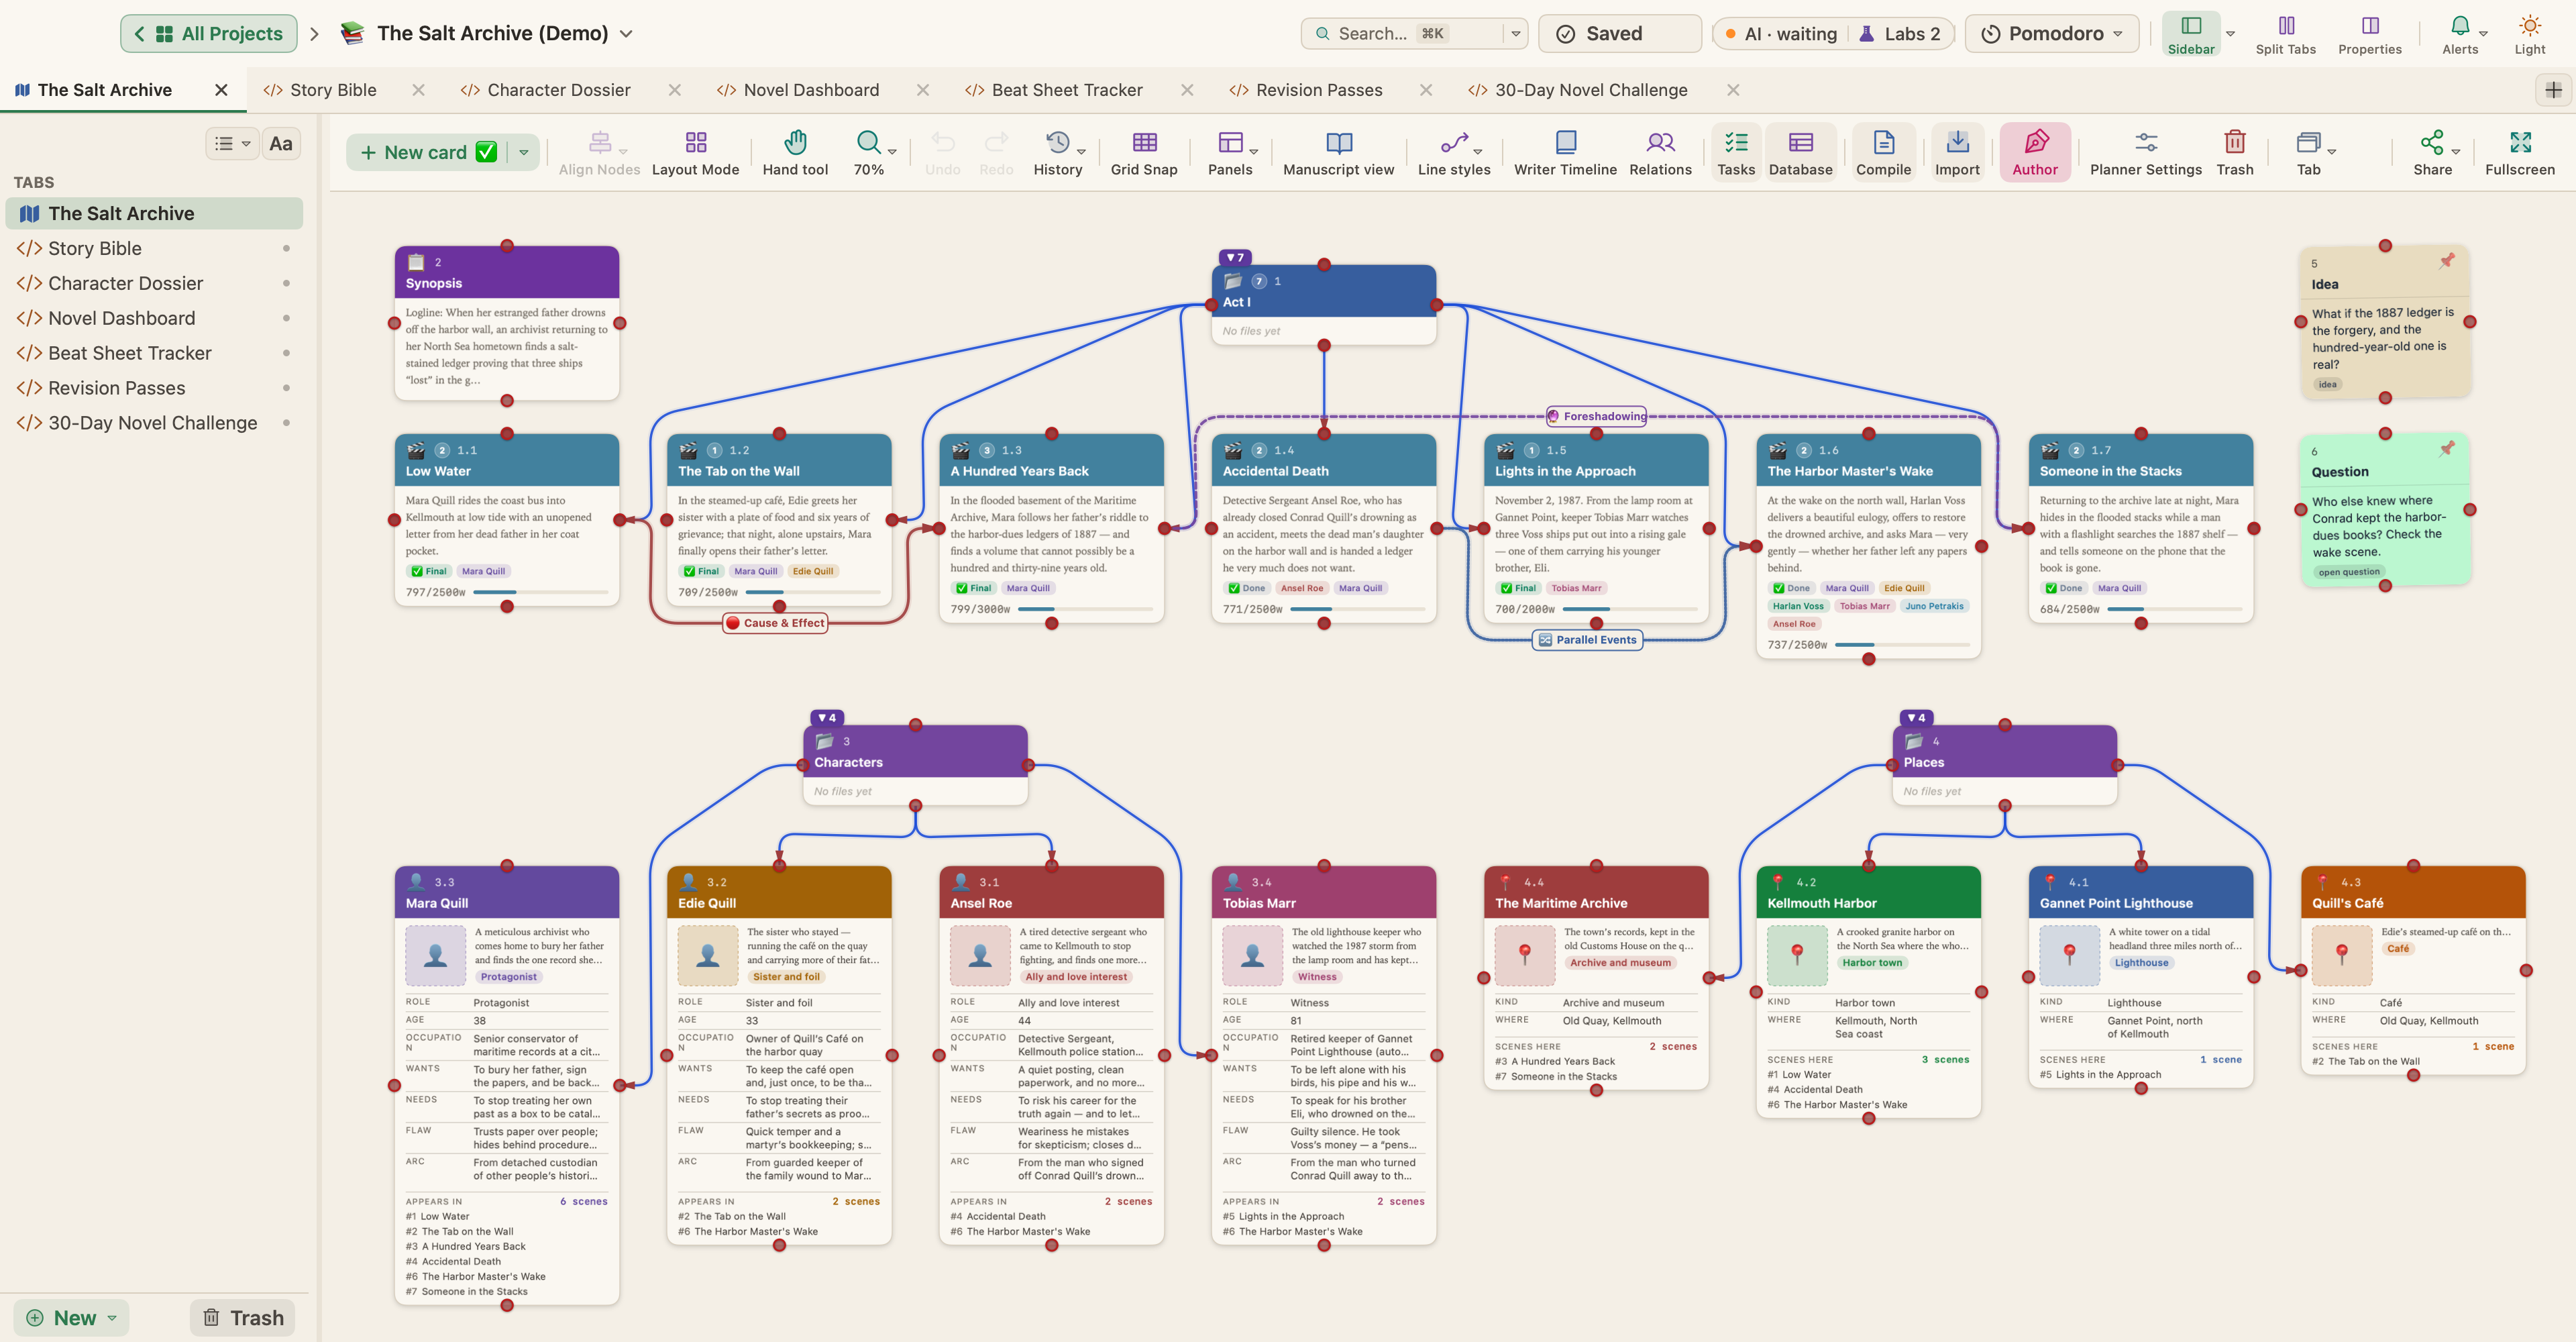
An outline is not a contract. It is a working map: enough to show where the story turns and what each scene is for, and loose enough to change when the draft surprises you.
The method below takes you from one sentence to a list of scenes you can write from. It works on paper or in any app, and the last part shows it in WriterMorph.
Start with one sentence
Before acts or chapters, write the premise as a single sentence. It needs three things:
- Who wants what. A protagonist with a goal the reader can understand.
- What stands in the way. A person, a force or a flaw that makes the goal hard to reach.
- What is at stake. What the protagonist loses by failing.
A shape that works: someone wants something, but something stands in the way, and failing will cost them something they can't afford to lose.
The Salt Archive, a sample mystery you can download from this site, starts from a sentence like this: an archivist comes home to her North Sea harbor town after her father drowns, and finds a ledger proving that the ships lost in a great storm in 1987 were sunk on purpose. It names the person, the trigger and the discovery that sets the plot moving.
If the sentence won't come, the trouble is usually the want. Decide what your protagonist is after, and the obstacles tend to suggest themselves.
Randy Ingermanson's Snowflake Method builds a whole outline outward from this sentence. The sentence grows into a paragraph, the paragraph into a page, the main characters get summaries of their own, and the longer synopsis finally becomes a list of scenes. Even if you never follow every step, the idea holds: expand in layers, and fix problems while they are still one line long.
Find the turning points
Many novels use some version of three-act structure: a setup, a long middle of rising trouble, and a resolution. What makes it useful is not the three parts but the turns between them.
- At the end of act one, something happens that the protagonist can't ignore, and it commits them to the story.
- Around the middle, a midpoint changes the stakes or what the protagonist understands.
- Near the end of act two comes the low point.
- Act three holds the climax and what follows from it.
Syd Field's paradigm for screenwriters calls the two big turns plot points, and the idea carries over to novels. Write one line for each turn. With the premise and four or five turning points, you have a skeleton.
Other structures divide the same journey differently:
| Approach | Comes from | What you plan | Useful for |
|---|---|---|---|
| Three-act structure | Aristotle's beginning, middle and end; Syd Field for film | Setup, confrontation, resolution and the turns between them | Almost any novel |
| Snowflake Method | Randy Ingermanson | A sentence, then a paragraph, a page, character summaries and a scene list | Planning in layers |
| Save the Cat! beat sheet | Blake Snyder, for screenwriters | Fifteen named beats from Opening Image to Final Image, each with a rough place in the story | Checking pace |
| Hero's Journey | Joseph Campbell; Christopher Vogler's twelve stages | A departure, an ordeal and a return | Quests and adventures |
| Freytag's pyramid | Gustav Freytag, on five-act drama | Exposition, rising action, climax, falling action, denouement | Short stories and plays |
None of them is a rule. Pick the one that matches how you think, and use it to check the story rather than to write it for you.
Break the acts into scene cards
Now split each act into scenes, one scene per card. A card needs very little:
- a short title,
- whose point of view the scene is in, and who else is there,
- a sentence or two about what happens,
- what changes: what the main character knows, has or wants at the end that differs from the start.
The last line is the test. A scene where nothing changes is a summary in disguise: merge it with a neighbor or cut it. A scene whose change has nothing to do with your premise sentence may belong to another book.
Write the cards quickly, in any order, as they come. Numbering can wait.
Reorder and look for gaps
Lay the cards out act by act and read them in order, like a comic strip. Then move them. A reveal may land harder two scenes later; two quiet scenes in a row may really be one. Look for:
- a turning point with no scene that delivers it,
- a long stretch where the tension never rises,
- a character or subplot that disappears for a whole act,
- an effect that comes before its cause.
Each gap is a card you haven't written yet. When every turn has a scene behind it and the order holds, the outline is ready enough to start drafting.
Outlining in WriterMorph
In WriterMorph the outline and the book are the same cards. The Visual Planner canvas, the binder of Manuscript Mode and the Writer Timeline all read them, so a scene card you make while planning is the document you later write in.
Start from a structure
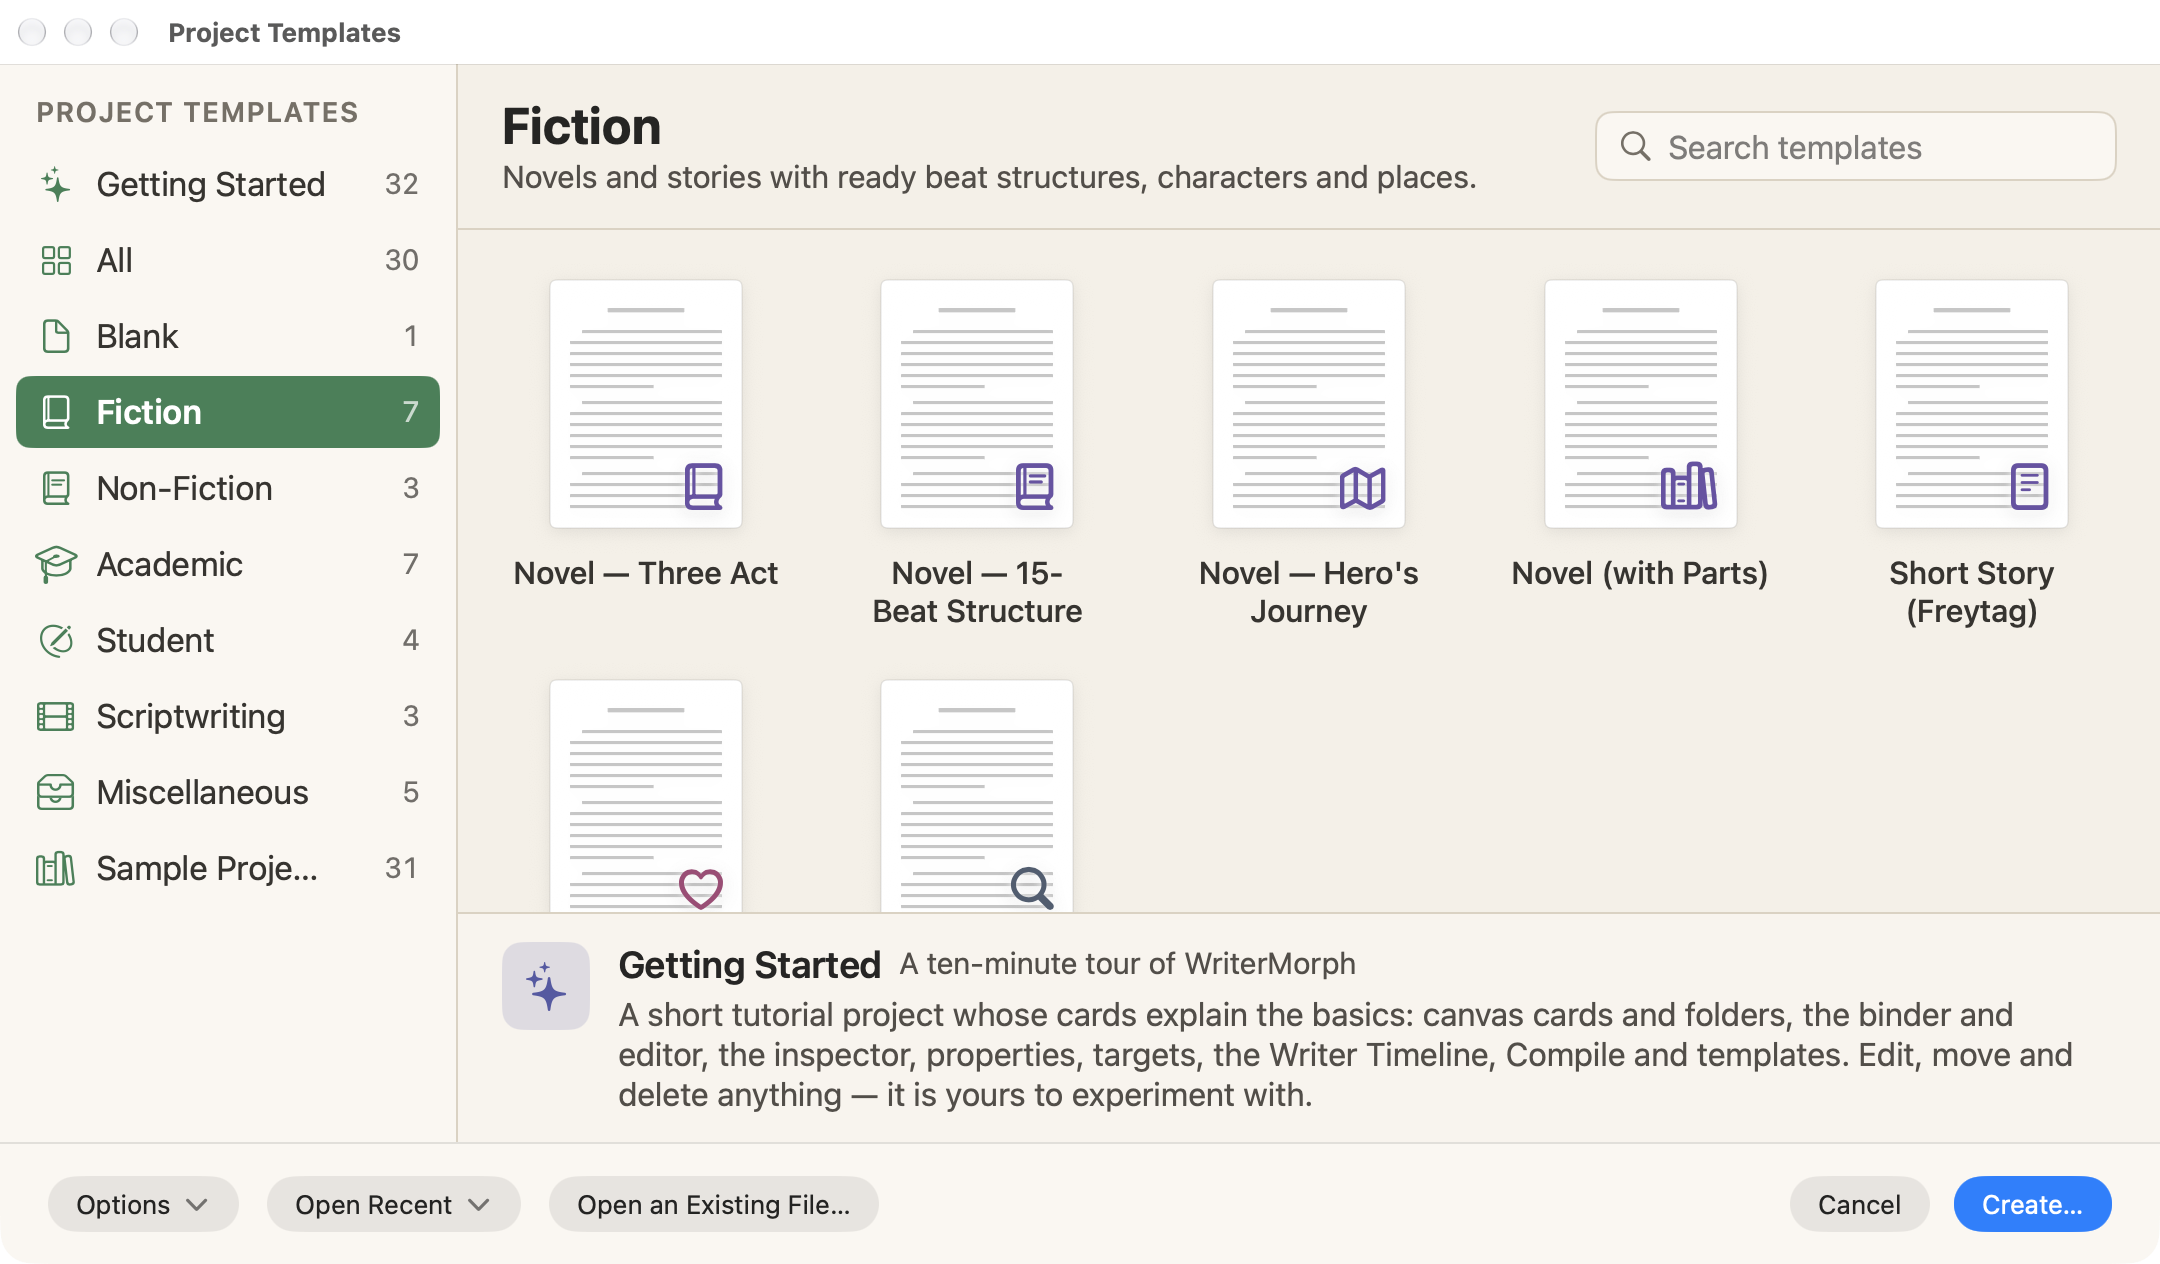
Choose File › New Project… (⇧⌘N) and pick the Fiction category in the template gallery: Novel: Three Act, Novel: 15-Beat Structure, Novel: Hero's Journey, Novel (with Parts), Short Story (Freytag), Romance Novel and Mystery / Thriller. Each comes with its folders and scene cards, guidance in every card and a synopsis on each. Every scene is already tagged with a beat and a target tension, so the story views show the shape of the book before you write a word.
Make the scene cards
On the canvas, press ⌘N to open the card type picker, or use the toolbar's New card ▾ button. Select a card and open View › Properties Panel (⌥⌘P) to fill in its fields. Fiction planners come with built-in fields such as Synopsis, POV, Characters, Beat, Tension, Location and Subplot, and up to four properties can be shown on the card face. Select several cards and the panel switches to Bulk edit, so you can set a beat or a POV for all of them in one step.
Check the shape against the beats
Open View › Writer Timeline (⌥⌘T). It needs Author mode, which fiction templates turn on for you. Its Plot Board is a grid of chapters across and plotlines down. Choose a beat sheet from the Structure menu: Three Act Structure, Hero's Journey, 15-Beat Structure or Freytag Pyramid. When you switch structures, WriterMorph spreads your scenes over the new beats; switch back, and your earlier beat assignments return.
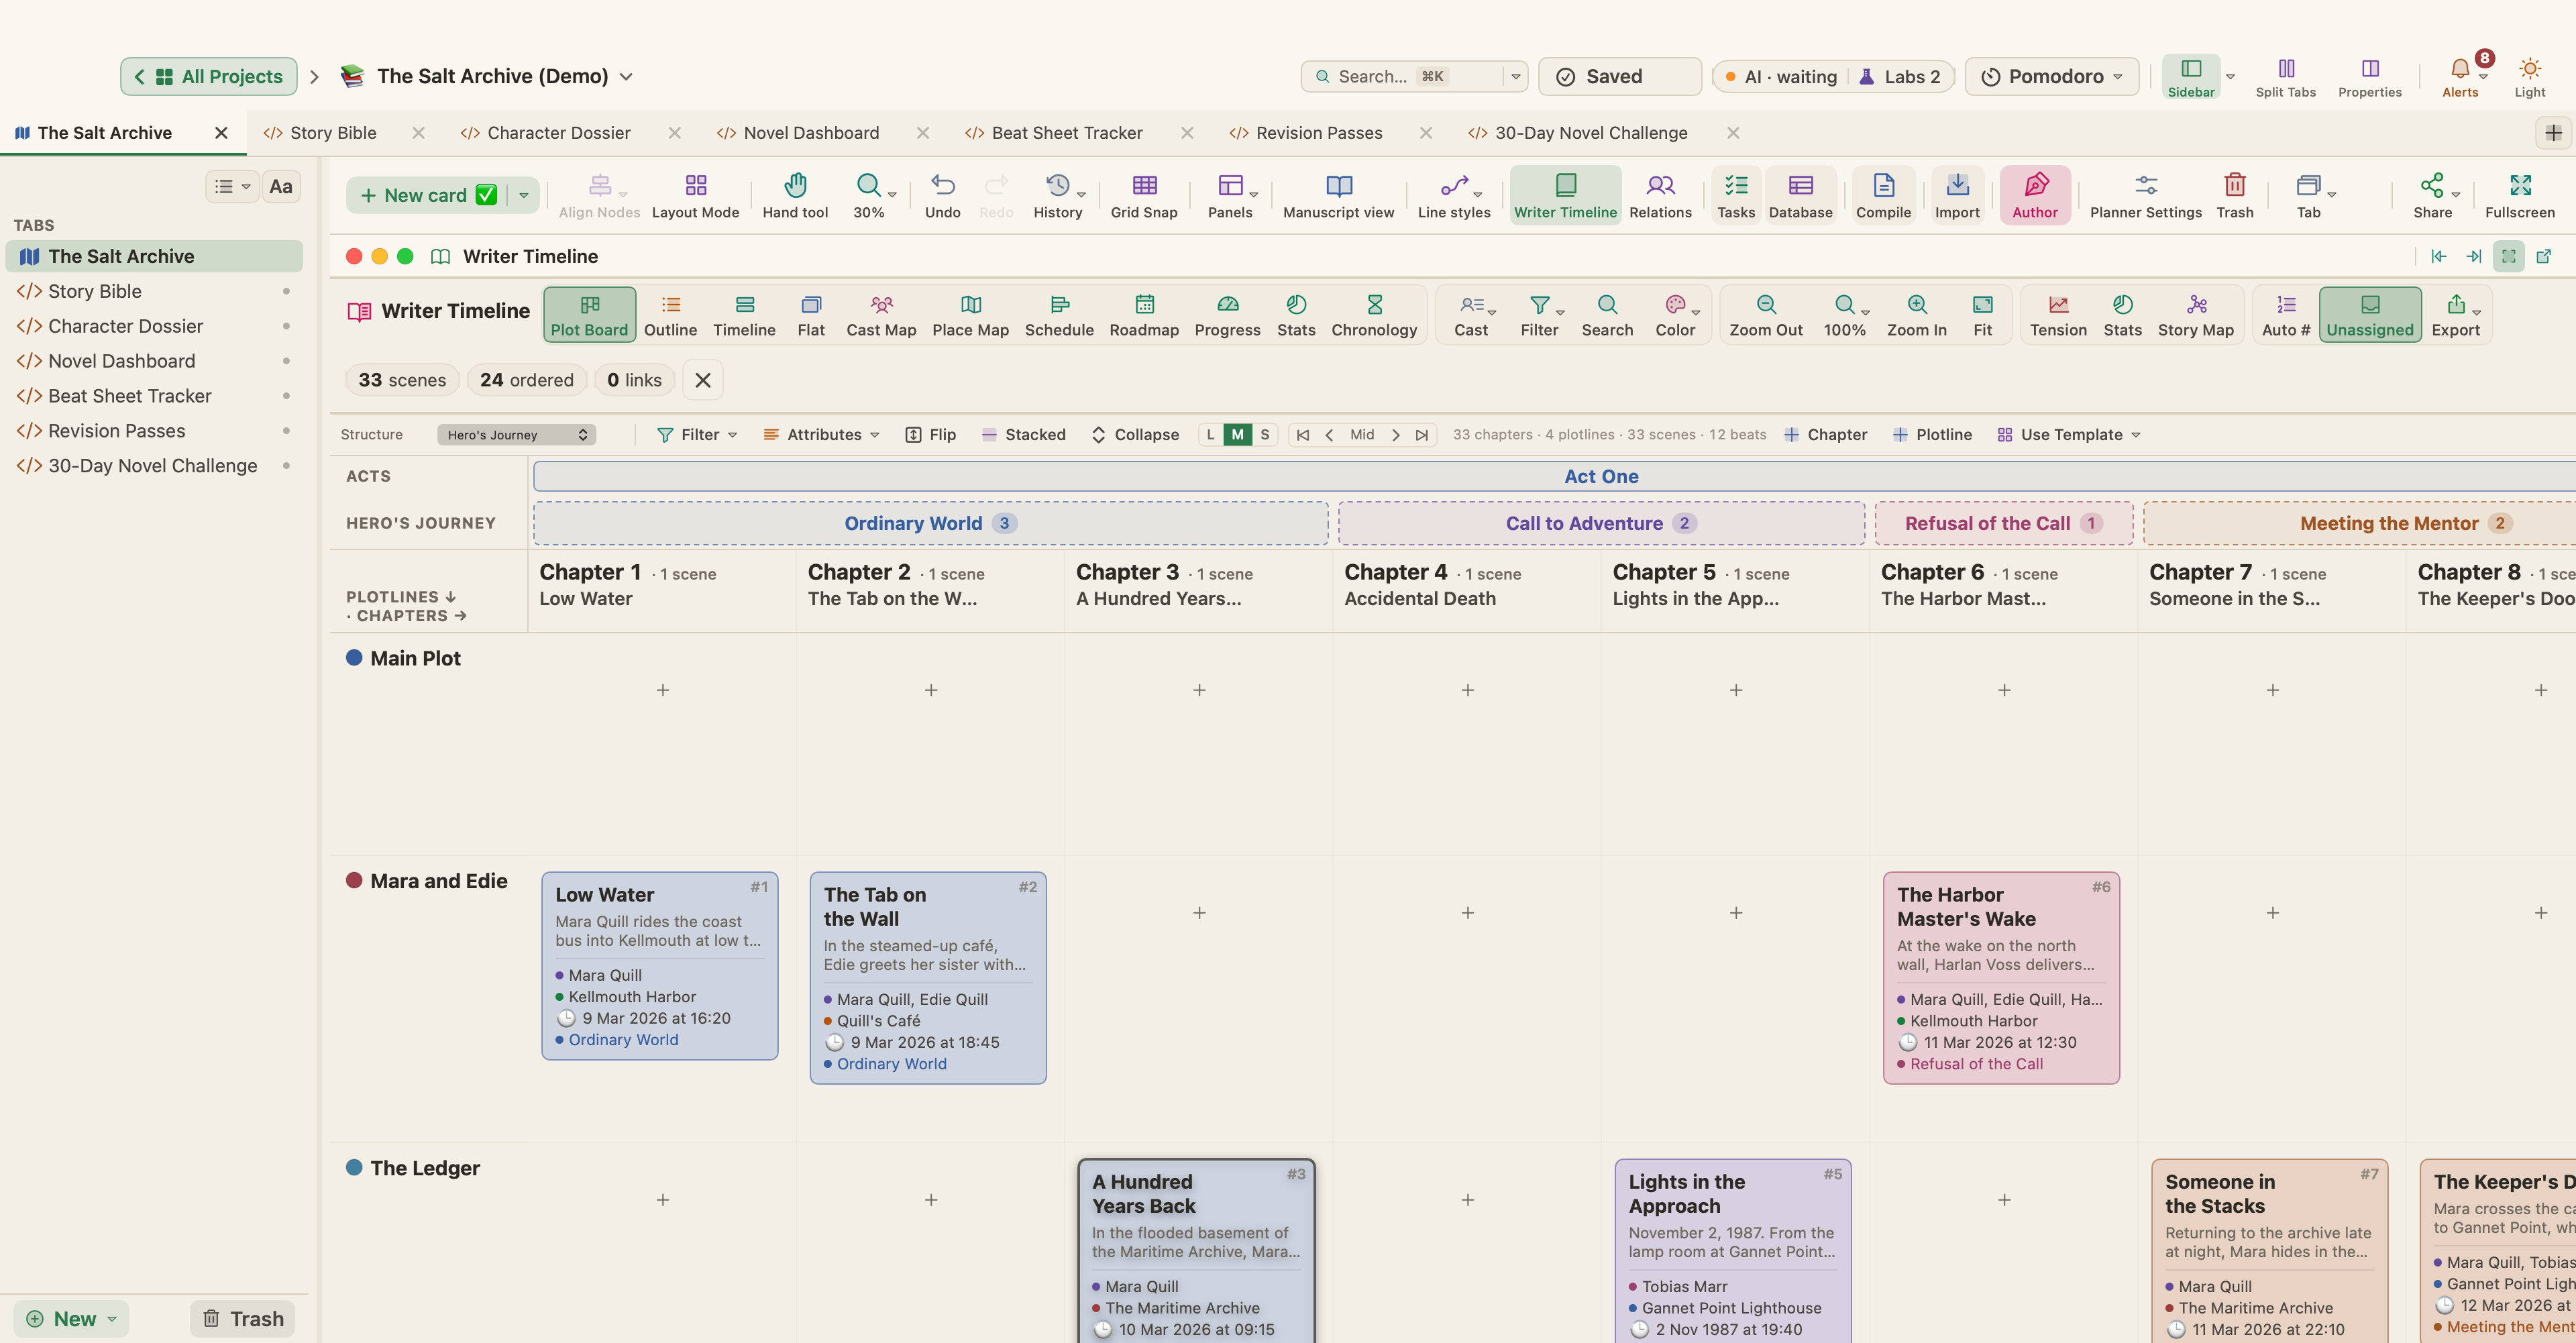
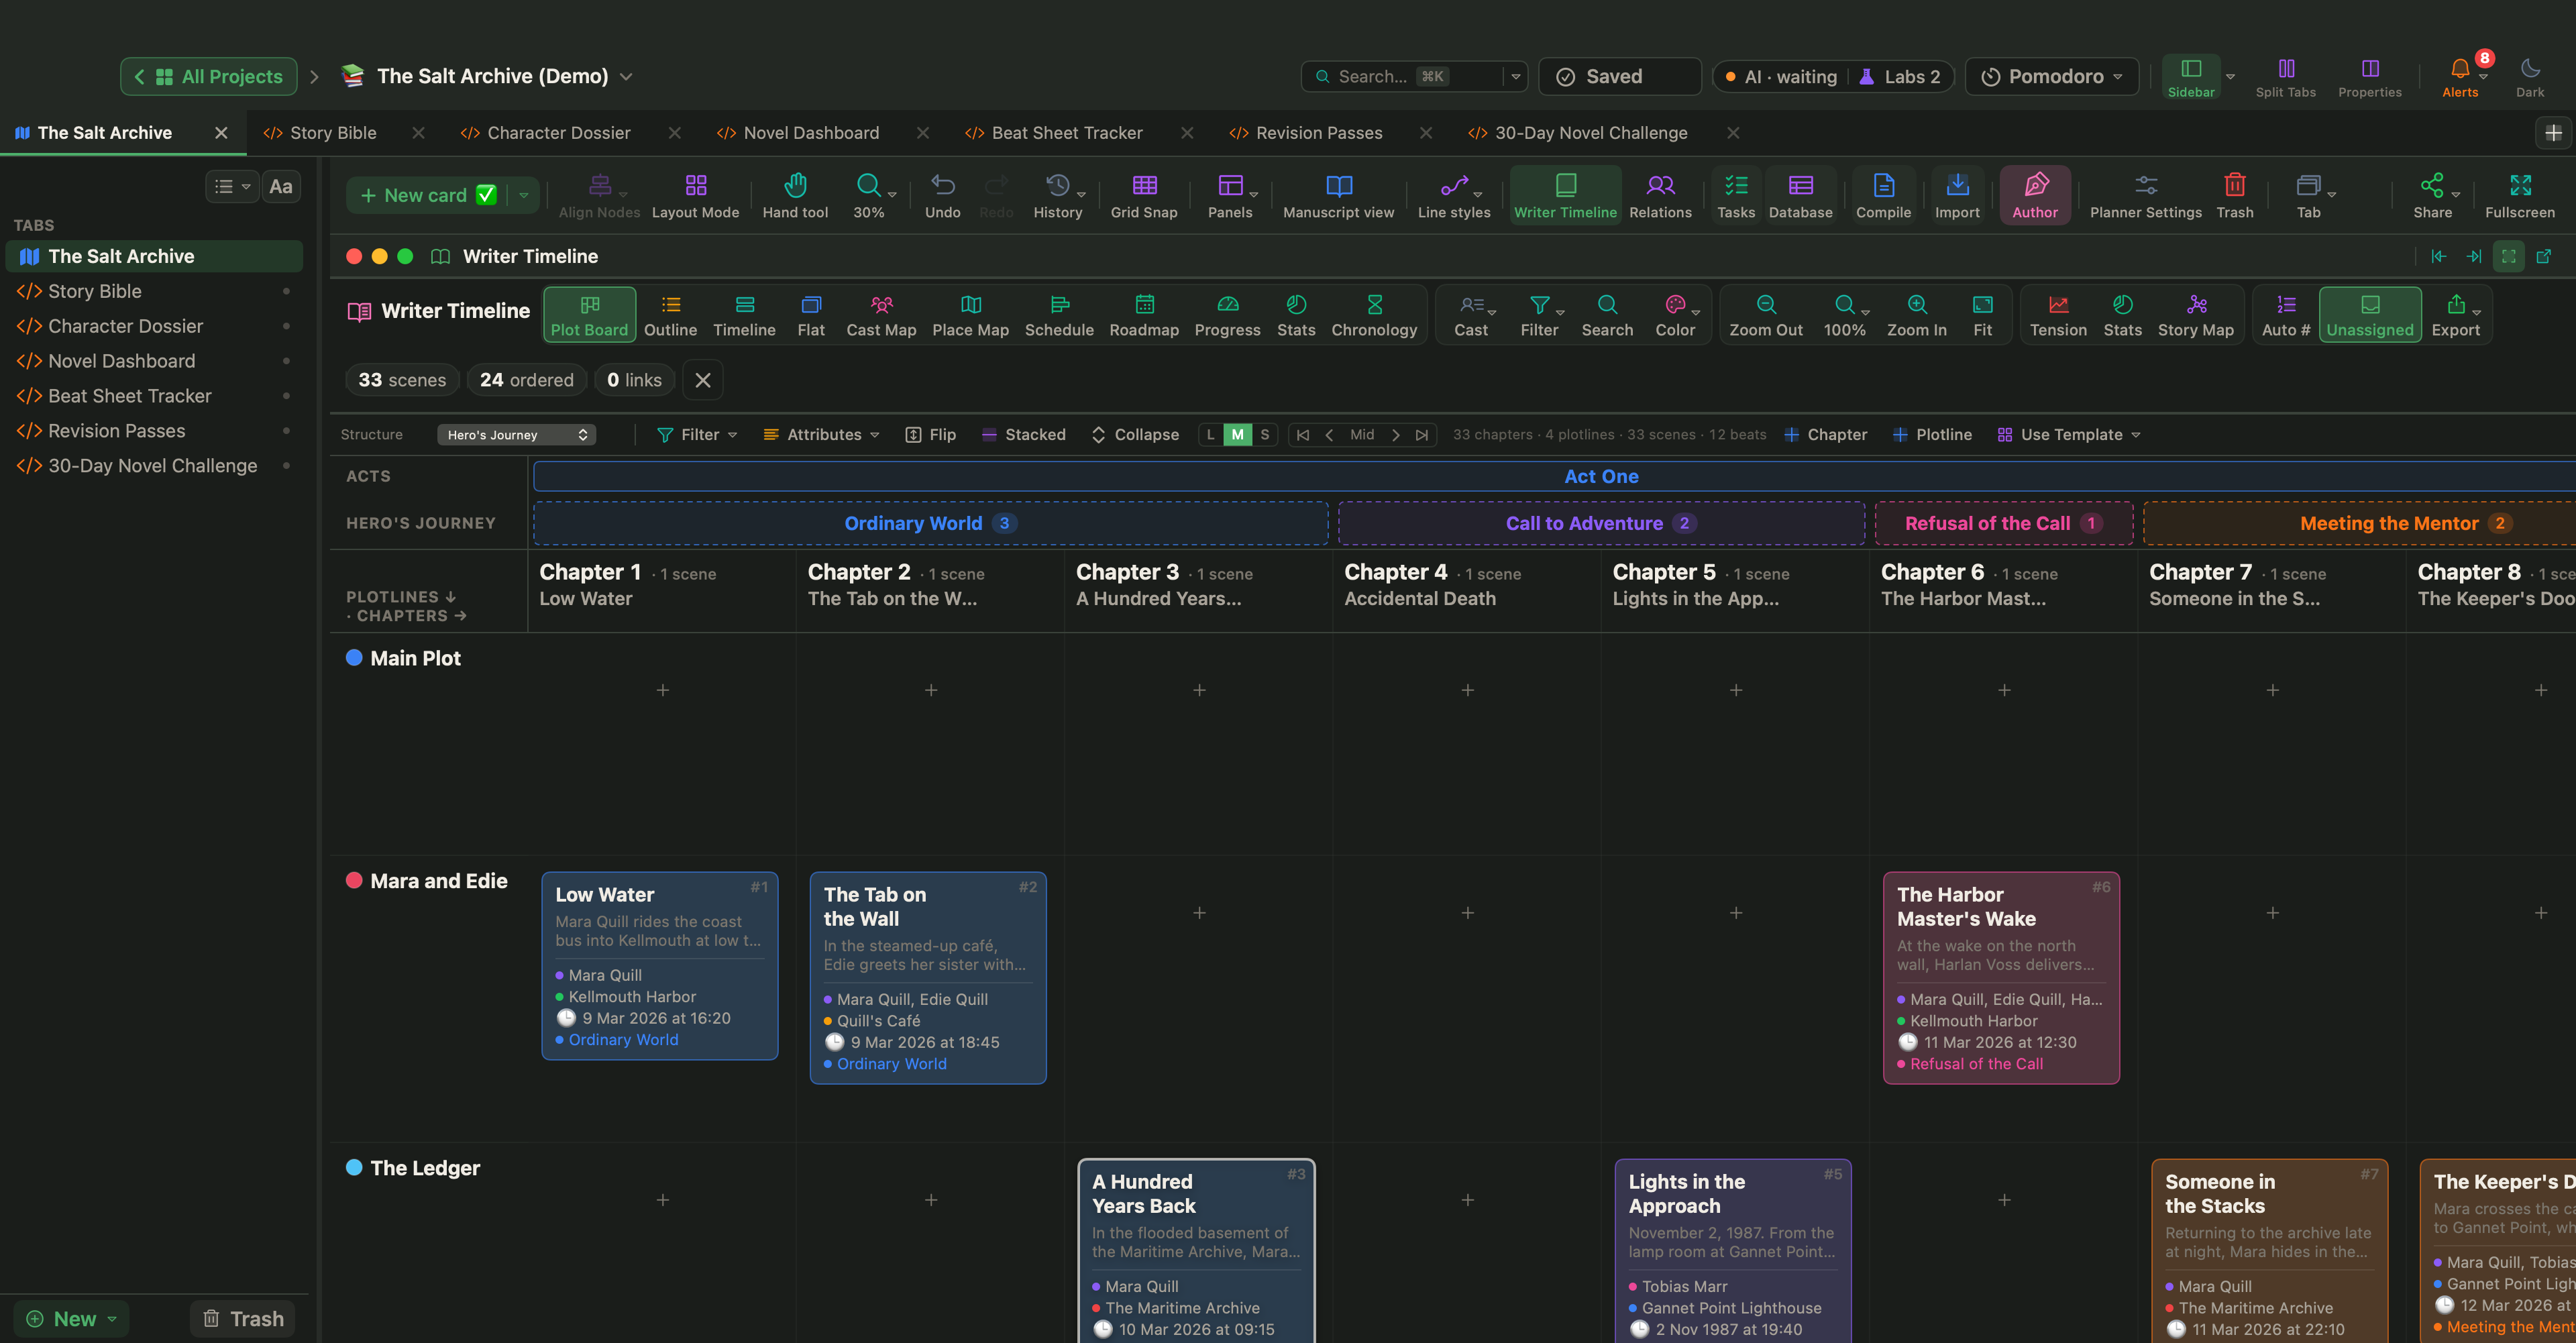
Then look for gaps. The Story Map shows beat coverage for the whole book, with missing beats as dashed columns; right-click an empty cell for New scene here. Book Stats lists scenes with no beat, character, place or summary under Needs attention. The Tension panel draws the curve of the book from each scene's rating, 1 to 10, and Ideal Shape lays a classic three-act shape over it.
Reorder the scenes
Press ⌃⌘M for Manuscript Mode. The Corkboard (⌘2) shows the scenes as index cards with their synopses; drag a card and the book is reordered. The Outliner (⌘3) lists titles and synopses with the columns you choose, including your own properties. The order in the binder is the order of the book, and the order Compile follows.
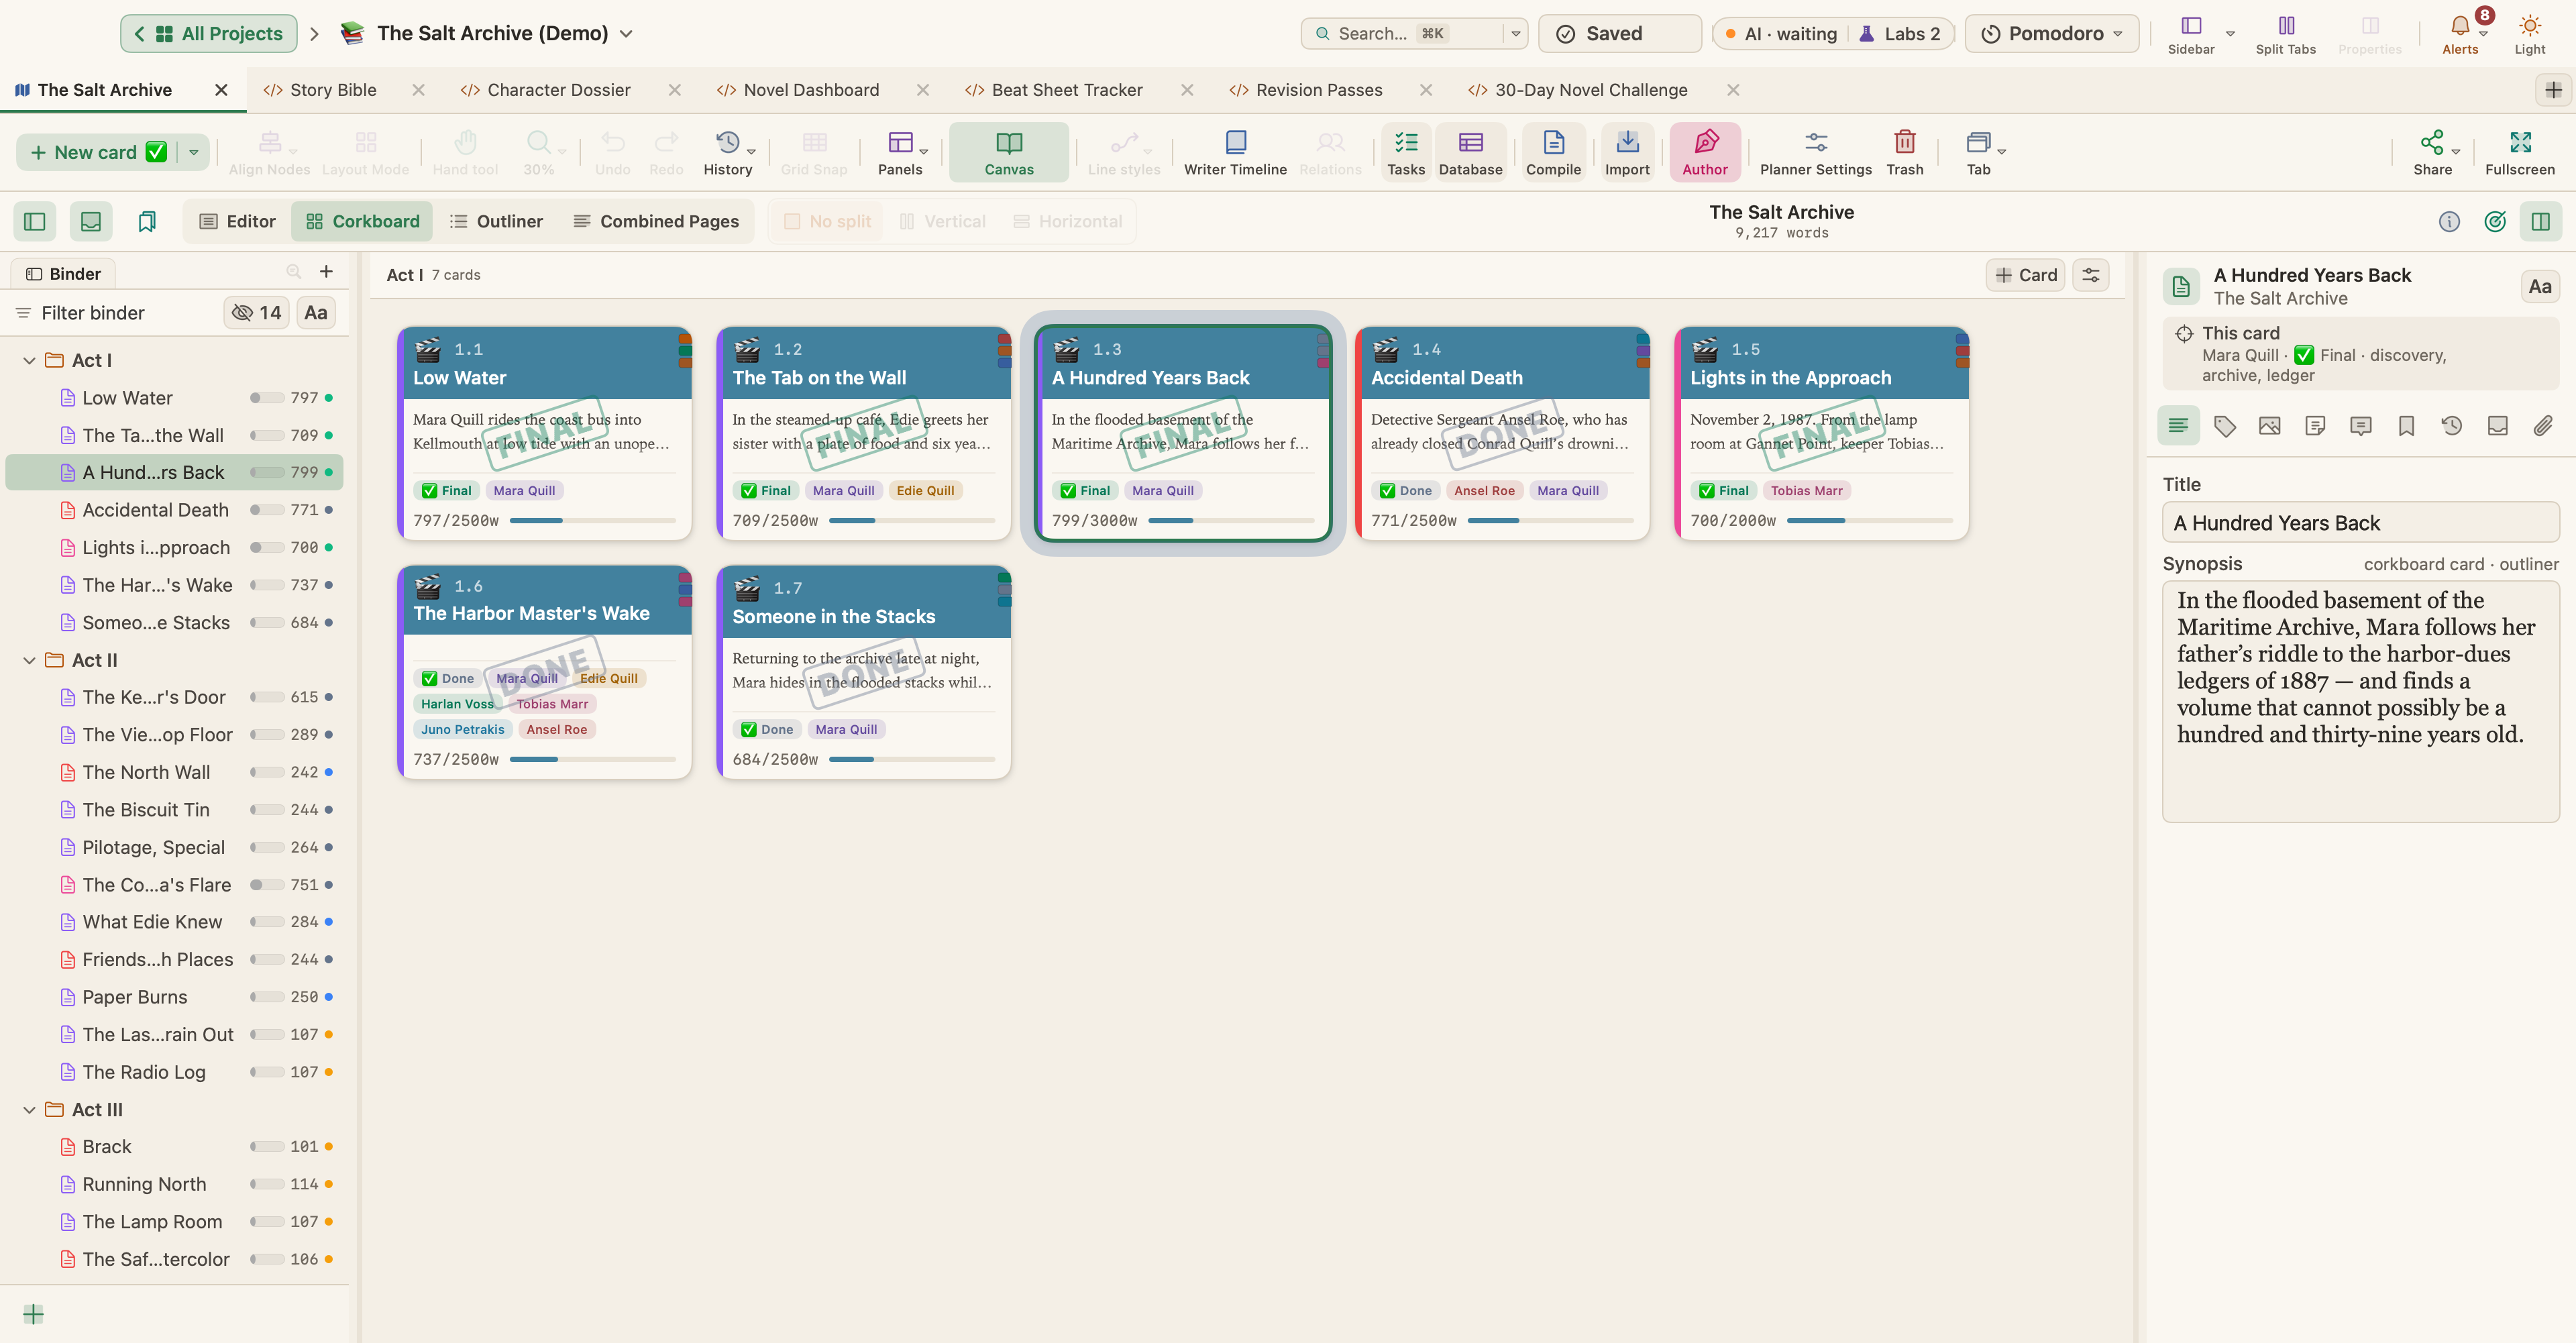
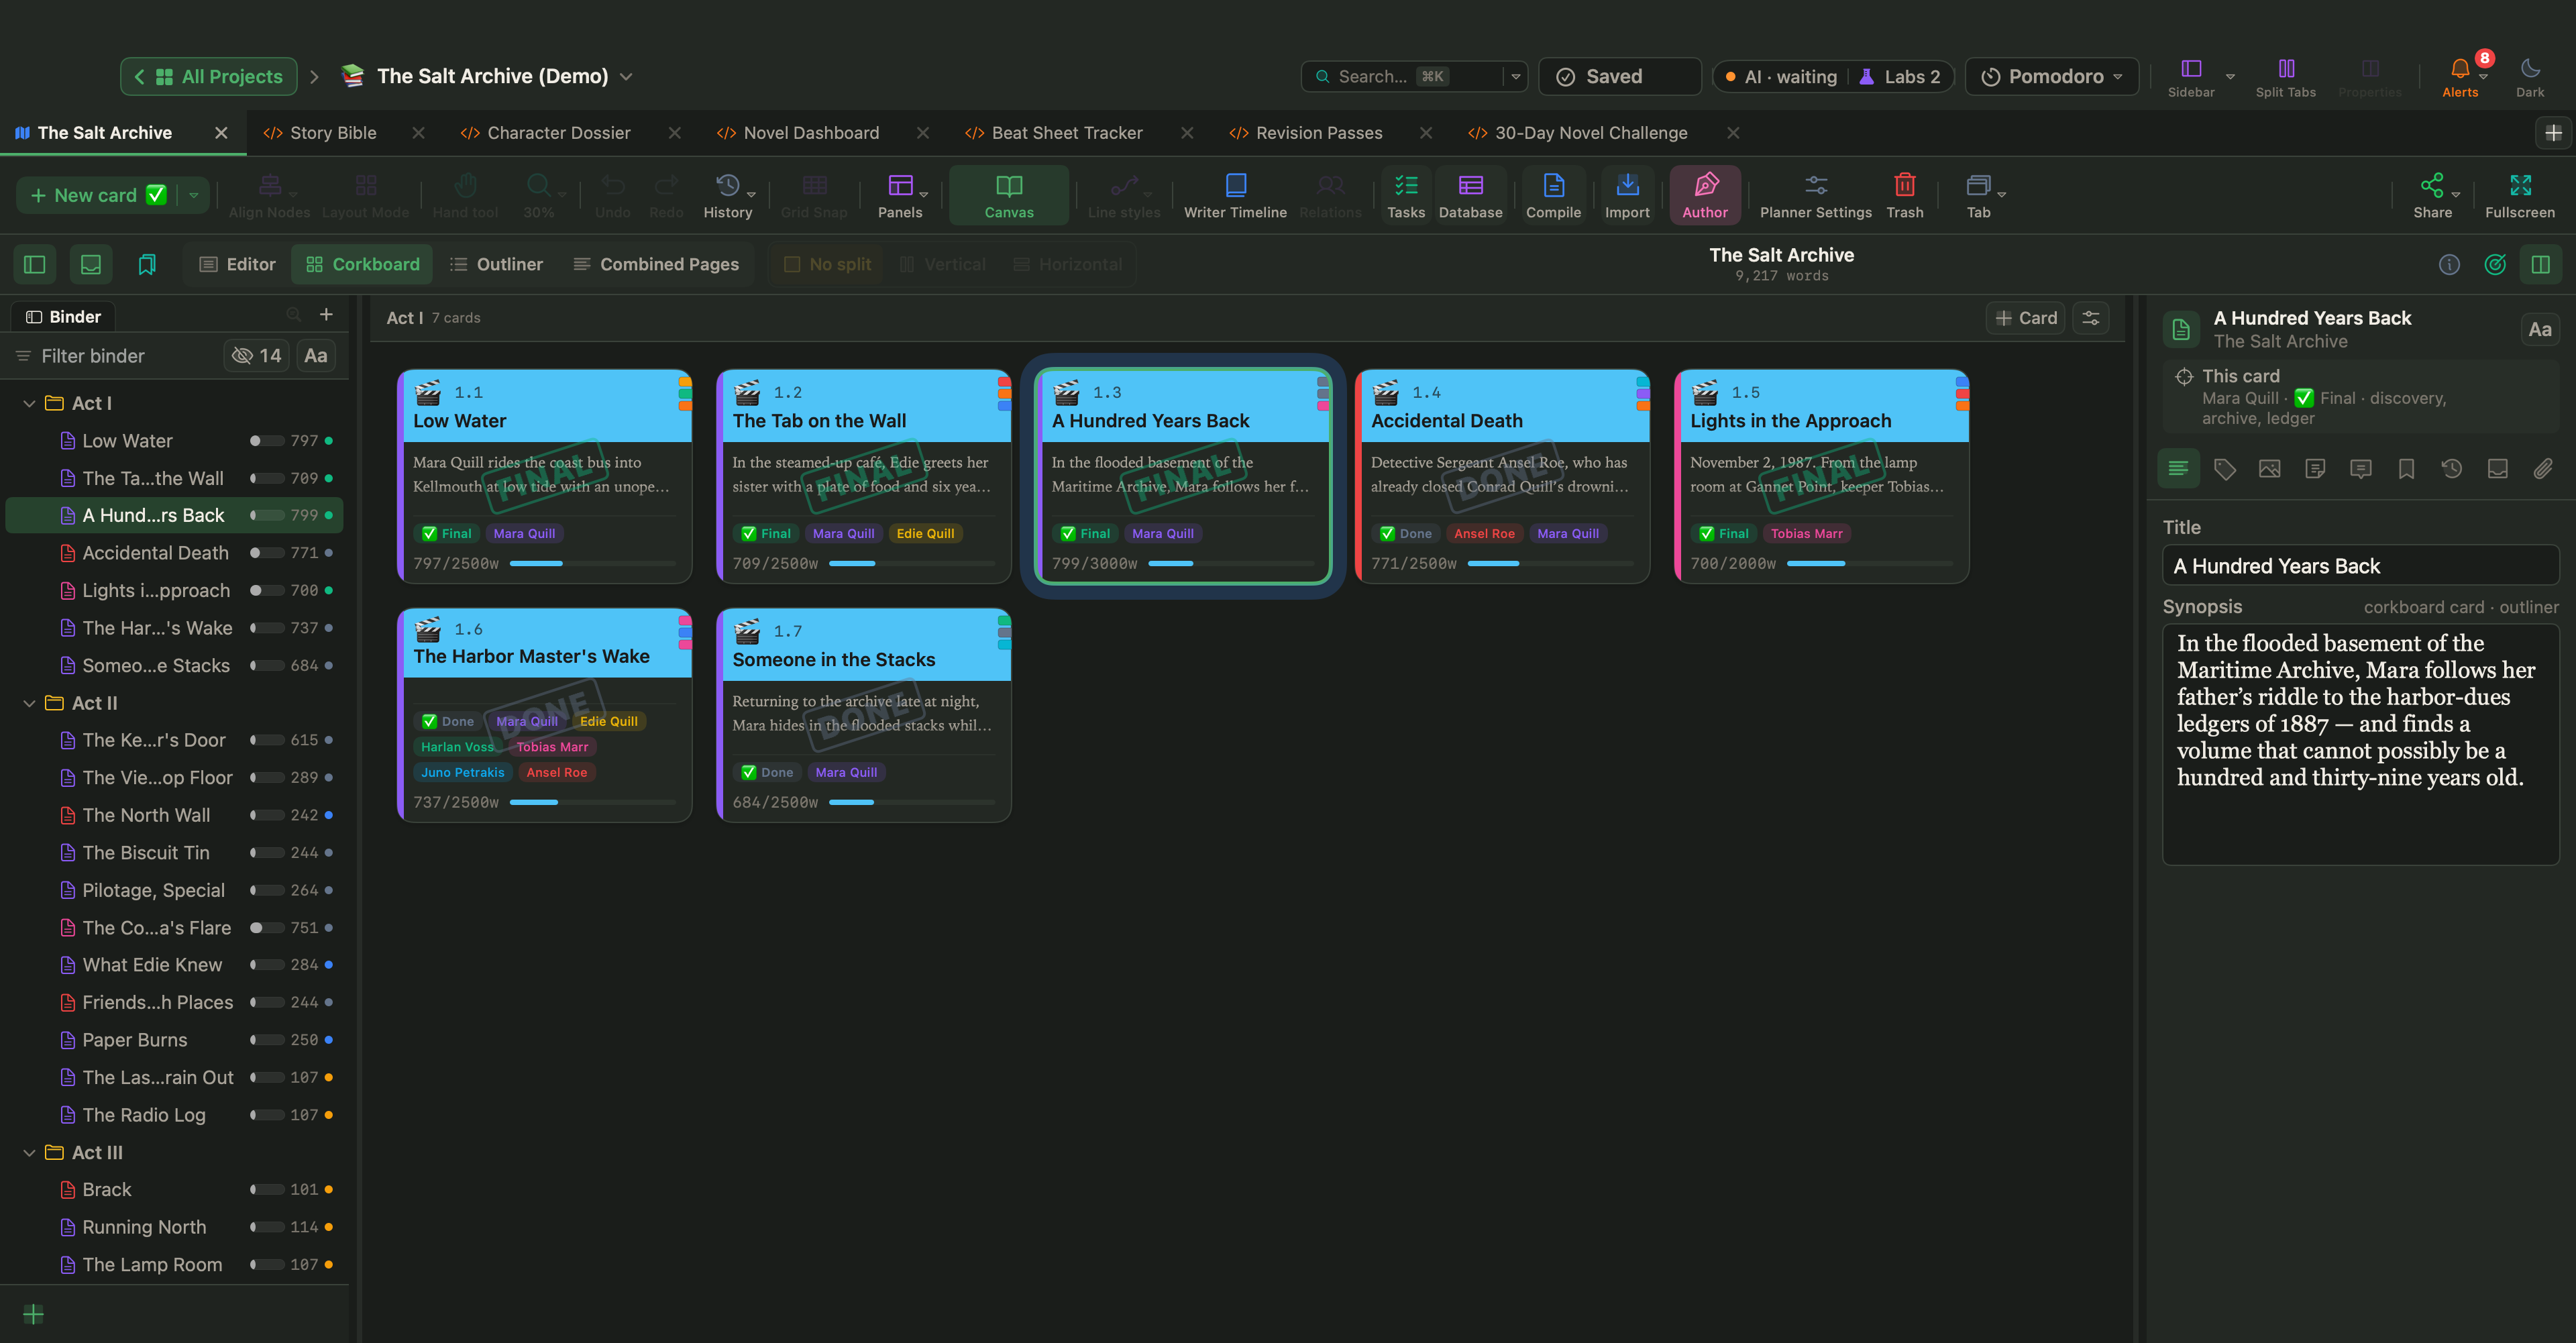
On the canvas, the Outline panel (⌘L) lists every card as a tree. Move a card with ⌥↑ and ⌥↓, and indent or outdent it with ⌥→ and ⌥←.
Start small: one sentence, a handful of turns, a stack of cards, and fill the gaps the board shows you. Once the scenes have dates, keeping the timeline straight is the next step.